Auto-Approving Actions
⚠️ SECURITY WARNING: Auto-approve settings bypass confirmation prompts, giving Roo direct access to your system. This can result in data loss, file corruption, or worse. Command line access is particularly dangerous, as it can potentially execute harmful operations that could damage your system or compromise security. Only enable auto-approval for actions you fully trust.
Auto-approve settings speed up your workflow by eliminating repetitive confirmation prompts, but they significantly increase security risks.
Quick Start Guide
- Open the Auto-Approve dropdown next to the chat input
- Toggle "Enabled" at the bottom-right of the dropdown to activate or pause auto-approval
- Use the All/None chips to bulk-select or clear permissions, or select individual tiles; you can keep Enabled On with "None" selected
- (Optional) Click the gear icon to open Settings for deeper per-permission controls
Keyboard Shortcut and Command Palette
Default shortcut: Cmd+Alt+A (macOS) / Ctrl+Alt+A (Windows/Linux)
Command Palette: roo-cline.toggleAutoApprove
Quickly toggle auto-approve on/off without using the mouse. Both the keyboard shortcut and the Command Palette command toggle the global "Enabled" state while preserving your permission selections.
Via Command Palette:
- Open the Command Palette (
Cmd+Shift+P/Ctrl+Shift+P) - Type "Toggle Auto-Approve" or search for
roo-cline.toggleAutoApprove - Press Enter to toggle the auto-approve state
To customize the shortcut:
- Open VS Code Command Palette (
Cmd+Shift+P/Ctrl+Shift+P) - Search for "Preferences: Open Keyboard Shortcuts"
- Search for the command name (varies by language):
- English: "Toggle Auto-Approve"
- Other languages: Look for the localized equivalent
- Click the pencil icon next to the command
- Press your desired key combination
- Press Enter to save
Note: The command name appears in your VS Code interface language. If you're using a non-English locale, the command will be translated accordingly.
Auto-Approve Dropdown

The dropdown shows a grid of permission tiles. Controls:
- Enabled (bottom-right): master pause/resume for auto-approval
- All / None (bottom-left): bulk select or clear permissions without changing Enabled
- Permission tiles: choose which actions can run without prompts; tiles disable only when Enabled is off. Some permissions take effect only if your model supports the capability.
Available Permissions
| Permission | What it does | Risk level |
|---|---|---|
| Read files and directories | Lets Roo access files without asking | Medium |
| Edit files | Lets Roo modify files without asking | High |
| Execute approved commands | Runs whitelisted terminal commands automatically | High |
| Use the browser | Allows headless browser interaction | Medium |
| Use MCP servers | Lets Roo use configured MCP services | Medium-High |
| Switch modes | Changes between Roo modes automatically | Low |
| Create & complete subtasks | Manages subtasks without confirmation | Low |
| Answer follow-up questions | Selects default answer for follow-up questions | Low |
Global Enabled Switch
How it works:
- Enabled On — Auto-approval runs for the permissions you’ve selected
- Enabled Off — Pauses all auto-approvals; your per-permission selections persist
- All / None — Bulk adjust selections while Enabled remains unchanged
- Note: Auto-approve only runs if Enabled is On and at least one permission is selected.
When to toggle:
- Sensitive or production work → Off
- Rapid iteration and refactors → On
- Switching between exploration and editing tasks
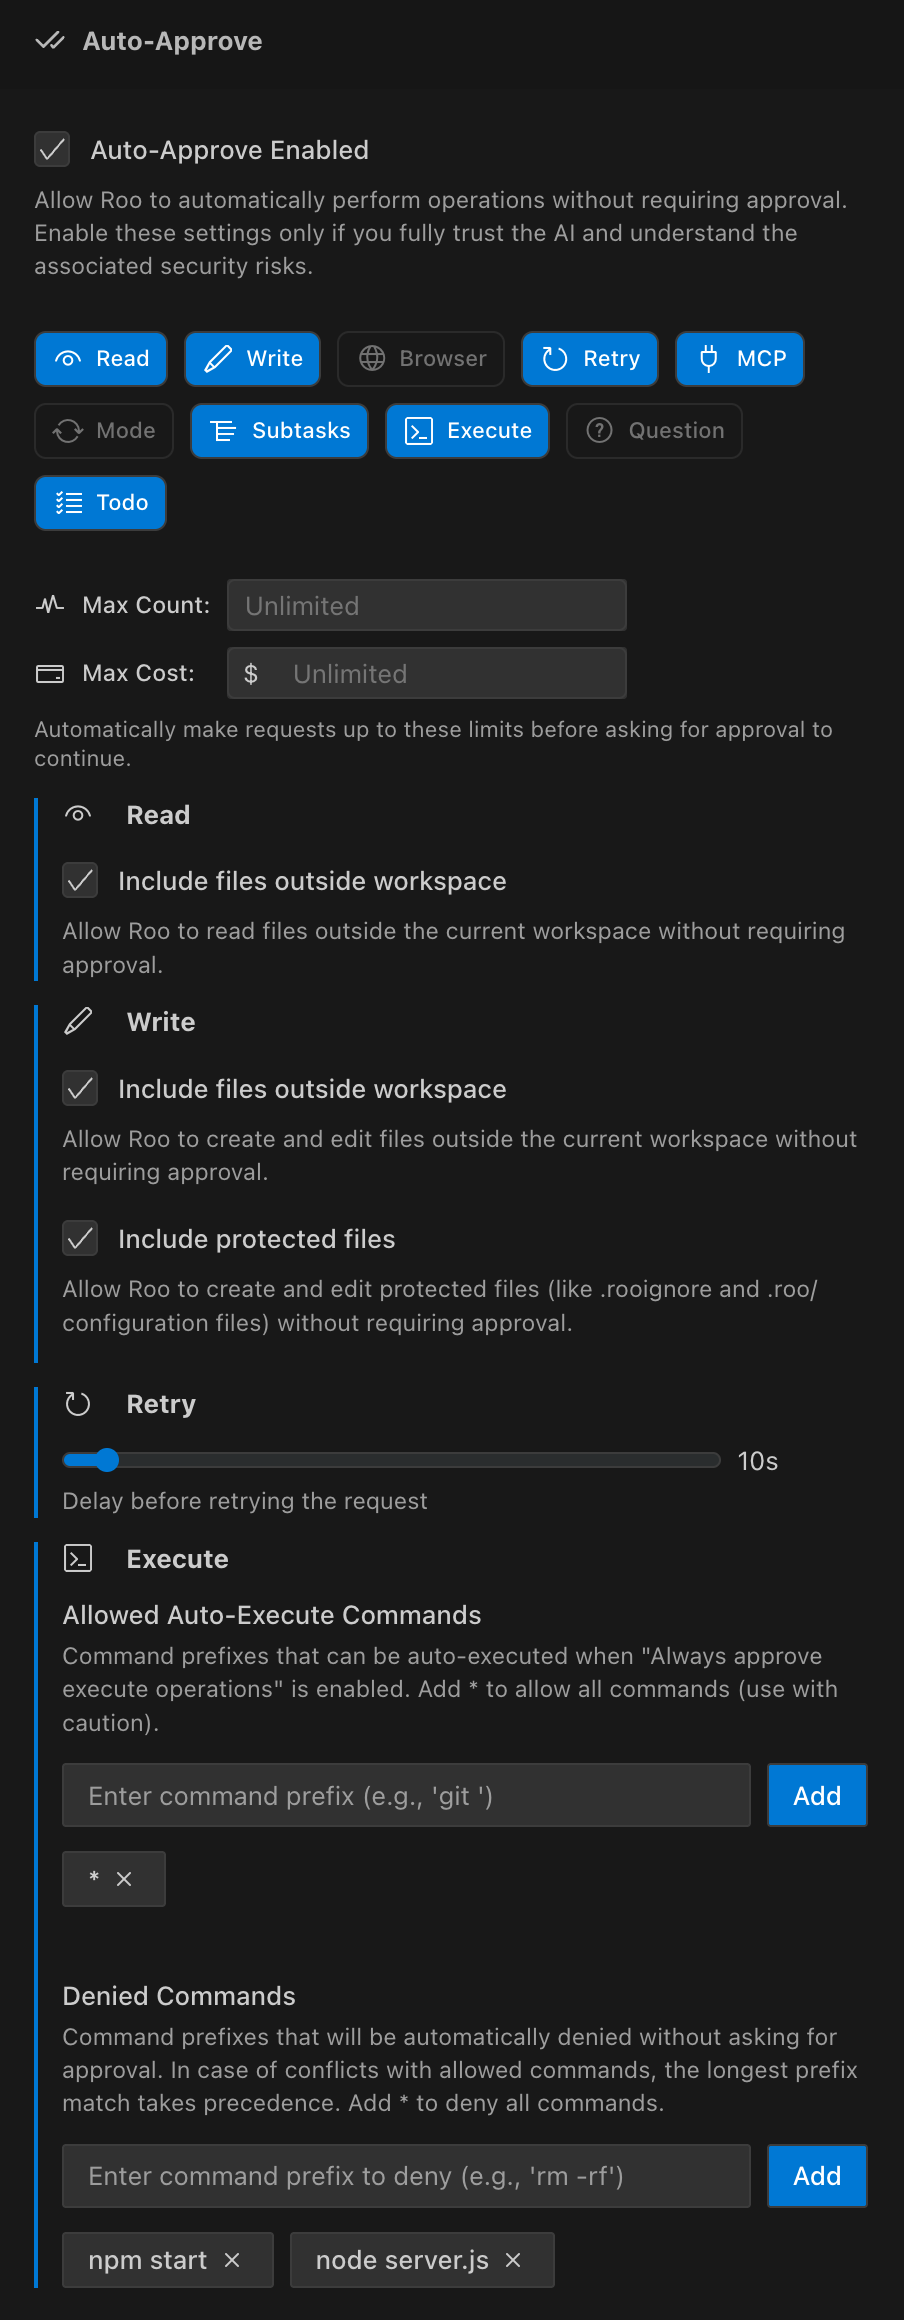
Advanced Settings Panel
The settings panel provides detailed control with important security context:
Allow Roo to automatically perform operations without requiring approval. Enable these settings only if you fully trust the AI and understand the associated security risks.
To access these settings:
- Click in the top-right of the dropdown
- Navigate to Auto-Approve Settings
The settings panel mirrors the same permissions with additional context and safeguards.
Important behaviors
- Outside‑workspace reads/writes require the corresponding outside‑workspace flags in addition to the base permission.
- Auto‑approve for MCP tools requires both the global "Always approve MCP tools" and each tool's "Always allow". Resource access honors only the global setting.
- Mode switching is only auto‑approved when the mode-switch permission is enabled (covers switching to another mode and creating new modes).
- After auto‑writes, Roo waits using the global write‑delay control under Settings → Context Management → Diagnostics.
Read Operations
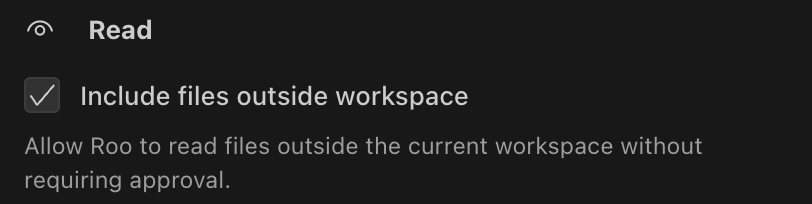
Setting: "Always approve read-only operations"
Description: "When enabled, Roo will automatically view directory contents and read files without requiring you to click the Approve button."
Additional option:
- Include files outside workspace: Allow Roo to read files outside the current workspace directory
Risk level: Medium
While this setting only allows reading files (not modifying them), it could potentially expose sensitive data. Still recommended as a starting point for most users, but be mindful of what files Roo can access.
Workspace Boundary Protection
By default, Roo can only read files within your current workspace directory. The "Include files outside workspace" option extends read access beyond the workspace boundary. Consider the security implications:
- Default (unchecked): Roo can only read files in your project directory
- Enabled: Roo can read any file on your system that you have access to
- Recommendation: Keep disabled unless you specifically need Roo to access external files
Write Operations
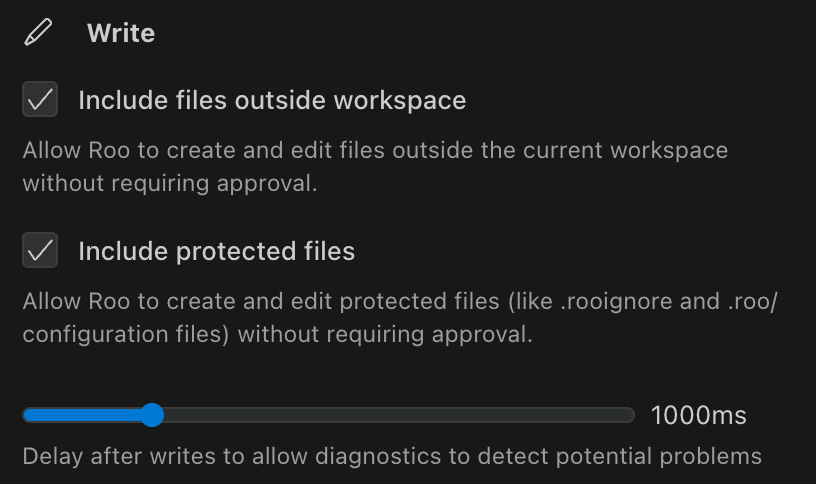
Setting: "Always approve write operations"
Description: "Automatically create and edit files without requiring approval"
Write delay control: Configured under Settings → Context Management → Diagnostics. See Diagnostics Integration.
Additional options:
- Include files outside workspace: Allow Roo to modify files outside the current workspace directory
- Include protected files: Allow Roo to modify files protected by
.roo/and.rooignoredirectory
Risk level: High
This setting allows Roo to modify your files without confirmation. The delay timer is crucial:
- Higher values (2000ms+): Recommended for complex projects where diagnostics take longer
- Default (1000ms): Suitable for most projects with active diagnostics
- 0ms: No delay - use when speed is critical
- Lower values: Use only when in a controlled environment
Security Boundaries
The write operations setting includes two important security controls:
-
Workspace Boundary Protection: By default, Roo can only modify files within your current workspace. Enable "Include files outside workspace" with extreme caution.
-
Protected Files: Roo blocks modification of:
- Files in the
.roo/directory - The
.rooignorefile
The "Include protected files" option bypasses this protection - use only when you specifically need to modify these files.
- Files in the
Write Delay & Problems Pane Integration
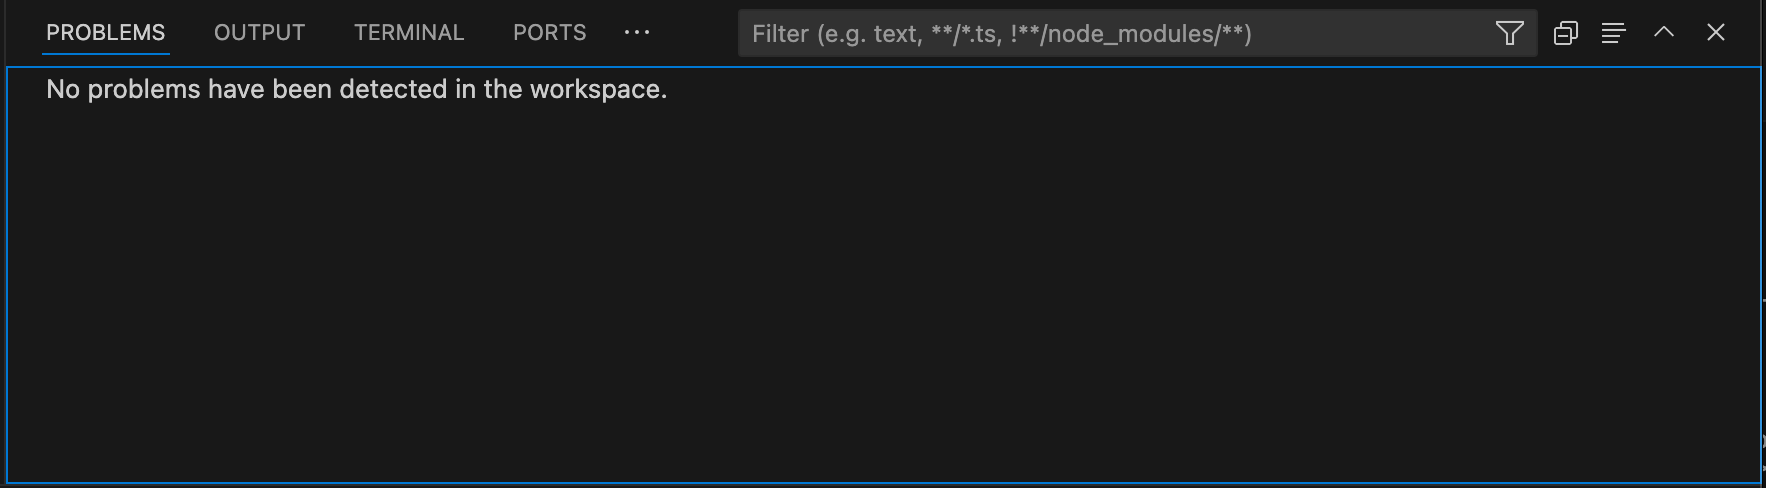
VSCode Problems pane that Roo checks during the write delay
When you enable auto-approval for writing files, Roo uses the global write-delay configured under Settings → Context Management → Diagnostics. The delay timer works with VSCode's Problems pane:
- Roo makes a change to your file
- VSCode's diagnostic tools analyze the change
- The Problems pane updates with any errors or warnings
- Roo notices these issues before continuing
This works like a human developer pausing to check for errors after changing code. You can adjust the delay time based on:
- Project complexity
- Language server speed
- How important error detection is for your workflow
MCP Tools
Setting: "Always approve MCP tools"
Description: "Enable auto-approval of individual MCP tools in the MCP Servers view (requires both this setting and the tool's individual 'Always allow' checkbox)"
Risk level: Medium-High (depends on configured MCP tools)
This setting requires a two-step permission process for security:
- Enable this global setting - Acts as a master switch for all MCP tool auto-approval
- Enable individual tool permissions - In the MCP Servers view, check "Always allow" for specific tools
Important: Both permissions must be active for a tool to auto-approve. This dual-permission system ensures you maintain granular control over which MCP tools can execute without confirmation. Resource retrieval (access_mcp_resource) honors only the global setting.
Permission Storage: Your MCP tool permissions are saved and will be remembered next time you use Roo Code.
Example workflow:
- Enable "Always approve MCP tools" in settings
- Navigate to MCP Servers view
- Find the specific tool (e.g., filesystem operations)
- Check its "Always allow" checkbox
- Only then will that specific tool auto-approve
Mode Switching
Setting: "Always approve mode switching"
Description: "Automatically switch between different modes without requiring approval"
Risk level: Low
Allows Roo to change between different modes (Code, Architect, etc.) without asking for permission. This primarily affects the AI's behavior rather than system access. Auto-approval also covers switching between modes and creating new modes when this permission is enabled.
Subtasks
Setting: "Always approve creation & completion of subtasks"
Description: "Allow creation and completion of subtasks without requiring approval"
Risk level: Low
Enables Roo to create and complete subtasks automatically. This relates to workflow organization rather than system access.
Command Execution
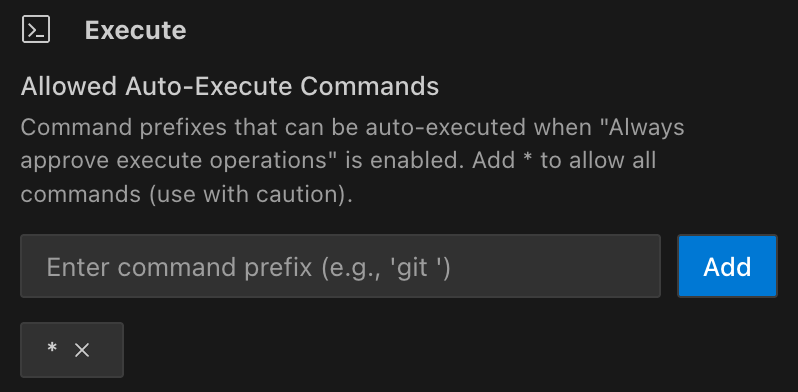
Setting: "Always approve allowed execute operations"
Description: "Automatically execute allowed terminal commands without requiring approval"
Command management: "Command prefixes that can be auto-executed when 'Always approve execute operations' is enabled. Add * to allow all commands (use with caution)."
Risk level: High
This setting allows terminal command execution with controls. Use an allowlist and a denylist together for defense-in-depth.
- Precedence: Deny rules take precedence when their matching prefix is equally or more specific than the allow match (longest-prefix wins).
- High-risk commands to deny by default:
- Unix/macOS: rm, sudo, dd, mkfs, diskutil eraseDisk, shutdown, reboot, chmod -R, chown -R, kill -9, curl | sh, wget | sh
- Git/Package: git push, npm publish, yarn publish, pnpm publish
- Windows/PowerShell: Remove-Item, Format-Volume, Stop-Process, shutdown, Set-ExecutionPolicy
- Production template:
- Deny all with "*" then allow specific safe prefixes like "git", "npm run", "echo".
- Dangerous substitution guard: Even allowed prefixes won’t auto-approve if the command contains dangerous parameter or process substitutions (e.g.,
${var@P}, subshells inserted into here-strings, zsh process substitution=(...), zsh glob qualifiers withe:...:).
Configuration
- UI (recommended): Settings → Auto‑Approve → Execute → use "Allowed Commands" and "Denied Commands" editors to add/remove prefixes.
- Settings JSON (alternative):
{
  "roo-cline.allowedCommands": ["git", "npm run", "echo"],
  "roo-cline.deniedCommands": ["git push", "npm publish", "rm", "sudo", "*"]
}
With both lists defined, the longest‑prefix rule applies; if deny is equally or more specific, it wins.
Examples of safe allow prefixes:
gitnpm runpython -m pytestcargo testgo testdocker pslscat
Security tip: Be specific with prefixes. Instead of allowing all python commands, limit to python -m pytest for test execution only.
Follow-Up Questions

Setting: Always default answer for follow-up questions
Description: Automatically selects the first AI-suggested answer for a follow-up question after a configurable timeout. This speeds up your workflow by letting Roo proceed without manual intervention.
Timeout slider: Use the slider to set the wait time from 1 to 300 seconds (Default: 60 seconds)
How it works:
- After the configured timeout, the first suggestion is automatically selected
- Any user action (choosing a different suggestion, editing, or typing your own response) cancels auto-selection
Override options: You can cancel auto-selection at any time by:
- Clicking a different suggestion
- Editing any suggestion
- Typing your own response
Risk level: Low
Use cases:
- Overnight runs where you want Roo to continue working
- Repetitive tasks where the default suggestions are usually correct
- Testing workflows where interaction isn't critical