Custom Instructions
Custom Instructions allow you to personalize how Roo behaves, providing specific guidance that shapes responses, coding style, and decision-making processes.
You can provide custom instructions using global rules (applied across all projects), workspace rules (project-specific), or through the Prompts tab interface.
Global Rules Directory: Apply to all projects automatically.
- Linux/macOS:
~/.roo/rules/and~/.roo/rules-{modeSlug}/ - Windows:
%USERPROFILE%\.roo\rules\and%USERPROFILE%\.roo\rules-{modeSlug}\
Workspace Rules: Apply only to the current project and take precedence over global rules when they conflict.
- Preferred Method: Directory (
.roo/rules/).
├── .roo/
│ └── rules/ # Workspace-wide rules
│ ├── 01-general.md
│ └── 02-coding-style.txt
└── ... (other project files) - Fallback Method: Single File (
.roorules).
├── .roorules # Workspace-wide rules (single file)
└── ... (other project files)
Mode-Specific Instructions: Apply only to a specific mode (e.g., code).
- Preferred Method: Directory (
.roo/rules-{modeSlug}/).
├── .roo/
│ └── rules-code/ # Rules for "code" mode
│ ├── 01-js-style.md
│ └── 02-ts-style.md
└── ... (other project files) - Fallback Method: Single File (
.roorules-{modeSlug}).
├── .roorules-code # Rules for "code" mode (single file)
└── ... (other project files)
Rules are loaded in order: Global rules first, then workspace rules. If there's a conflict, workspace rules take precedence. See Global Rules Directory for details.
What Are Custom Instructions?
Custom Instructions define specific behaviors, preferences, and constraints beyond Roo's basic role definition. Examples include coding style, documentation standards, testing requirements, and workflow guidelines.
Setting Custom Instructions
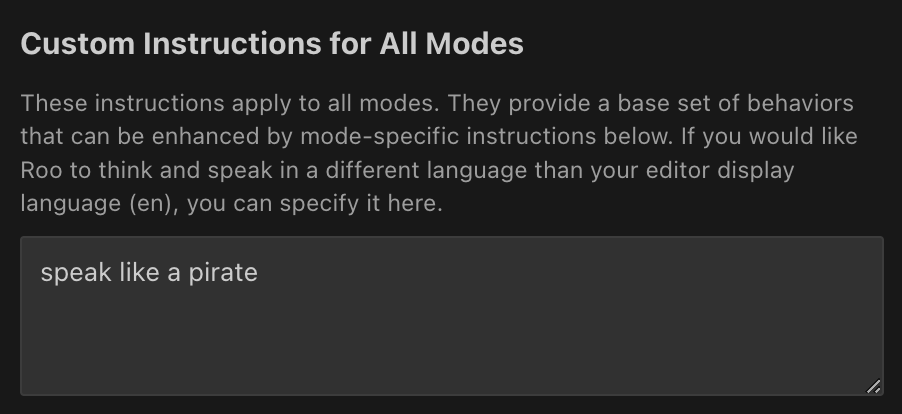
Global Custom Instructions
These instructions apply across all workspaces and maintain your preferences regardless of which project you're working on.
How to set them:

- Open Prompts Tab: Click the icon in the Roo Code top menu bar
- Find Section: Find the "Custom Instructions for All Modes" section
- Enter Instructions: Enter your instructions in the text area
- Save Changes: Click "Done" to save your changes
Global Rules Directory
The Global Rules Directory feature provides reusable rules and custom instructions that automatically apply across all your projects. This system supports both global configurations and project-specific overrides.
Key Benefits
Without Global Rules: You had to maintain separate rule files in each project:
- Copy the same rules to every new project
- Update rules manually across multiple projects
- No consistency between projects
With Global Rules: Create rules once and use them everywhere:
- Set up your preferred coding standards globally
- Customize specific rules per project when needed
- Maintain consistency across all your work
- Easy to update rules for all projects at once
Directory Structure
The global rules directory location is fixed and cannot be customized:
Linux/macOS:
~/.roo/                           # Your global Roo configuration
├── rules/                        # General rules applied to all projects
│   ├── coding-standards.md
│   ├── formatting-rules.md
│   └── security-guidelines.md
├── rules-code/                   # Rules specific to Code mode
│   ├── typescript-rules.md
│   └── testing-requirements.md
├── rules-docs-extractor/         # Rules for documentation extraction
│   └── documentation-style.md
└── rules-{mode}/                 # Rules for other specific modes
    └── mode-specific-rules.md
Windows:
%USERPROFILE%\.roo\               # Your global Roo configuration
├── rules\                        # General rules applied to all projects
│   ├── coding-standards.md
│   ├── formatting-rules.md
│   └── security-guidelines.md
├── rules-code\                   # Rules specific to Code mode
│   ├── typescript-rules.md
│   └── testing-requirements.md
└── rules-{mode}\                 # Rules for other specific modes
    └── mode-specific-rules.md
Setting Up Global Rules
-
Create Global Rules Directory:
# Linux/macOS
mkdir -p ~/.roo/rules

# Windows
mkdir %USERPROFILE%\.roo\rules -
Add General Rules (
~/.roo/rules/coding-standards.md):# Global Coding Standards
1. Always use TypeScript for new projects
2. Write unit tests for all new functions
3. Use descriptive variable names
4. Add JSDoc comments for public APIs -
Add Mode-Specific Rules (
~/.roo/rules-code/typescript-rules.md):# TypeScript Code Mode Rules
1. Use strict mode in tsconfig.json
2. Prefer interfaces over type aliases for object shapes
3. Always specify return types for functions
Available Rule Directories
| Directory | Purpose |
|---|---|
rules/ | General rules applied to all modes |
rules-code/ | Rules specific to Code mode |
rules-docs-extractor/ | Rules for documentation extraction |
rules-architect/ | Rules for system architecture tasks |
rules-debug/ | Rules for debugging workflows |
rules-{mode}/ | Rules for any custom mode |
Rule Loading Order
Rules are loaded in this order:
- Global Rules (from
~/.roo/) - Project Rules (from
project/.roo/) - take precedence over global rules when they conflict - [Generic only] Legacy Files (workspace root
.roorules,.clinerules) - used only if no generic rules directory content was loaded
Within each level, mode-specific rules are loaded before general rules.
Workspace-Level Instructions
These instructions only apply within your current workspace, allowing you to customize Roo Code's behavior for specific projects.
Workspace-Wide Instructions via Files/Directories
Workspace-wide instructions apply to all modes within the current project and can be defined using files:
- Preferred Method: Directory-Based (
.roo/rules/)- Create a directory named
.roo/rules/in your workspace root. - Place instruction files (e.g.,
.md,.txt) inside. Roo Code reads files recursively (including subdirectories), appending their content to the system prompt in alphabetical order based on filename. - When this directory exists and contains files, its contents are loaded along with any global rules directories.
- Note: If the
.roo/rules/directory exists but is empty, Roo Code will fall back to using the.roorulesfile instead.
- Create a directory named
- Fallback Method: File-Based (
.roorules)- If
.roo/rules/doesn't exist or is empty, Roo Code looks for a single.roorulesfile in the workspace root. - If found, its content is loaded.
- If
Mode-Specific Instructions
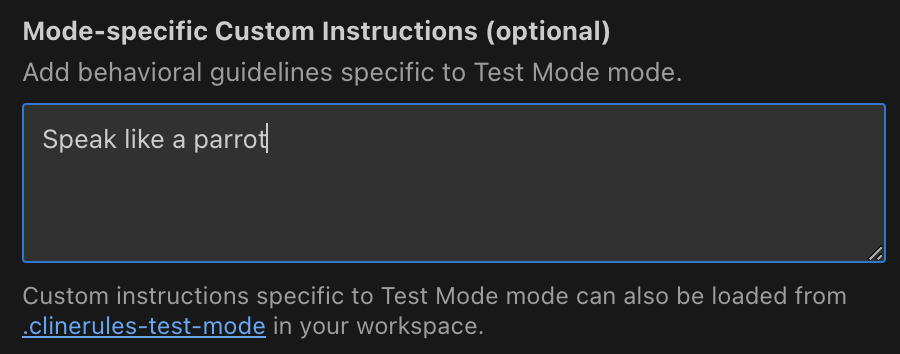
Mode-specific instructions can be set in two independent ways that can be used simultaneously:
-
Using the Prompts Tab:

-
Open Tab: Click the icon in the Roo Code top menu bar
-
Select Mode: Under the Modes heading, click the button for the mode you want to customize
-
Enter Instructions: Enter your instructions in the text area under "Mode-specific Custom Instructions (optional)"
-
Save Changes: Click "Done" to save your changes
Global Mode RulesIf the mode itself is global (not workspace-specific), any custom instructions you set for it will also apply globally for that mode across all workspaces.
-
-
Using Rule Files/Directories: Provide mode-specific instructions via files:
- Preferred Method: Directory-Based (
.roo/rules-{modeSlug}/)- Create a directory named
.roo/rules-{modeSlug}/(e.g.,.roo/rules-docs-writer/) in your workspace root. - Place instruction files inside (recursive loading, including subdirectories). Files are read and appended to the system prompt in alphabetical order by filename.
- This method takes precedence over the fallback file method for the specific mode if the directory exists and contains files.
- Create a directory named
- Fallback Method: File-Based (
.roorules-{modeSlug})- If
.roo/rules-{modeSlug}/doesn't exist or is empty, Roo Code looks for a single.roorules-{modeSlug}file (e.g.,.roorules-code) in the workspace root. - If found, its content is loaded for that mode.
- If
- Preferred Method: Directory-Based (
Instructions from the Prompts tab, global rules, workspace rules, and mode-specific rules are all combined. See the section below for the exact order.
How Instructions are Combined
Instructions are placed in the system prompt in this exact format:
====
USER'S CUSTOM INSTRUCTIONS

The following additional instructions are provided by the user, and should be followed to the best of your ability without interfering with the TOOL USE guidelines.

Language Preference:
[Language preference if set]

Global Instructions:
[Global Instructions from Prompts Tab]

Mode-specific Instructions:
[Mode-specific Instructions from Prompts Tab for the current mode]

Rules:

# Rules from rules-{modeSlug} directories:
[Contents of ALL files from ~/.roo/rules-{modeSlug}/ AND .roo/rules-{modeSlug}/ if they exist]

# Rules from .roorules-{modeSlug}:
[Contents of .roorules-{modeSlug} file if no mode-specific directories have files]

# Rules from .rooignore:
[.rooignore-related instructions if applicable]

# Agent Rules Standard (AGENTS.md):
[Contents of AGENTS.md or AGENT.md from workspace root if present and enabled]

# Rules from rules directories:
[Contents of ALL files from ~/.roo/rules/ AND .roo/rules/ if they exist]

# Rules from .roorules:
[Contents of .roorules file if no general rules directories have files]

====
Note: The system loads rules from ALL applicable directories (both global ~/.roo/ and workspace .roo/), not just the first one with files. Mode-specific rules appear before general rules. Directory-based rules take precedence over file-based fallbacks only when determining which method to use, but all applicable directories are read.
Rules about .rules files
- File Location: The preferred method uses directories within
.roo/(.roo/rules/and.roo/rules-{modeSlug}/). The fallback method uses single files (.roorulesand.roorules-{modeSlug}) located directly in the workspace root. - Recursive Reading: Rules directories are read recursively, including all files in subdirectories
- File Filtering: System automatically excludes cache and temporary files (
.DS_Store,*.bak,*.cache,*.log,*.tmp,Thumbs.db, etc.) - Empty Files: Empty or missing rule files are silently skipped
- Source Headers: Directory-based rules include per-file headers
# Rules from {absolute path}:, while file-based rules include# Rules from {filename}:headers - Aggregation: Both global and workspace rules directories are aggregated for mode-specific and generic rules (not either-or)
- Sorting: Files are sorted by basename only, case-insensitive
- Header Paths: Header paths are absolute and follow symlinks
- Rule Interaction: Mode-specific rules complement global rules rather than replacing them
- Symbolic Links: Fully supported for both files and directories, with a maximum resolution depth of 5 to prevent infinite loops
AGENTS.md Support
Roo Code also supports loading rules from an AGENTS.md (or AGENT.md as fallback) file in your workspace root:
- Purpose: Provides agent-specific rules and guidelines for AI behavior
- Location: Must be in the workspace root directory
- Loading: Automatically loaded by default. To disable AGENTS.md loading, set
"roo-cline.useAgentRules": falsein your VSCode settings - Setting:
roo-cline.useAgentRules(default: true) - Preference: If both exist,
AGENTS.mdis preferred overAGENT.md - Priority: Loaded after mode-specific rules and
.rooignore, before generic rules from both~/.roo/rulesand.roo/rules - Header: Added to system prompt with header
# Agent Rules Standard (AGENTS.md):or(AGENT.md):accordingly - Empty Files: Empty or whitespace-only
AGENTS.mdis ignored - Symbolic Links: Symbolic links to files or directories are resolved before reading
This feature allows teams to maintain standardized AI agent behavior rules that can be version-controlled alongside the project code.
Examples of Custom Instructions
- "Always use spaces for indentation, with a width of 4 spaces"
- "Use camelCase for variable names"
- "Write unit tests for all new functions"
- "Explain your reasoning before providing code"
- "Focus on code readability and maintainability"
- "Prioritize using the most common library in the community"
- "When adding new features to websites, ensure they are responsive and accessible"
For team environments, consider these approaches:
Project Standards: Use workspace .roo/rules/ directories under version control to standardize Roo's behavior for specific projects. This ensures consistent code style and development workflows across team members.
Organization Standards: Use global rules (~/.roo/rules/) to establish organization-wide coding standards that apply to all projects. Team members can set up identical global rules for consistency across all work.
Hybrid Approach: Combine global rules for organization standards with project-specific workspace rules for project-specific requirements. When rules conflict, workspace rules take precedence.
The directory-based approach offers better organization than single .roorules files and supports both global and project-level customization.
Combining with Custom Modes
For advanced customization, combine with Custom Modes to create specialized environments with specific tool access, file restrictions, and tailored instructions.