Recommended MCP Servers
While Roo Code can connect to any Model Context Protocol (MCP) server that follows the specification, the community has already built several high-quality servers that work out-of-the-box. This page curates the servers we actively recommend and provides step-by-step setup instructions so you can get productive in minutes.
We'll keep this list up-to-date. If you maintain a server you'd like us to consider, please open a pull-request.
Context7
Context7 is our first-choice general-purpose MCP server. It ships a collection of highly-requested tools, installs with a single command, and has excellent support across every major editor that speaks MCP.
Why we recommend Context7
- One-command install – everything is bundled, no local build step.
- Cross-platform – runs on macOS, Windows, Linux, or inside Docker.
- Actively maintained – frequent updates from the Upstash team.
- Rich toolset – database access, web-search, text utilities, and more.
- Open source – released under the MIT licence.
Installing Context7 in Roo Code
There are two common ways to register the server:
- Global configuration – available in every workspace.
- Project-level configuration – checked into version control alongside your code.
We'll cover both below.
1. Global configuration
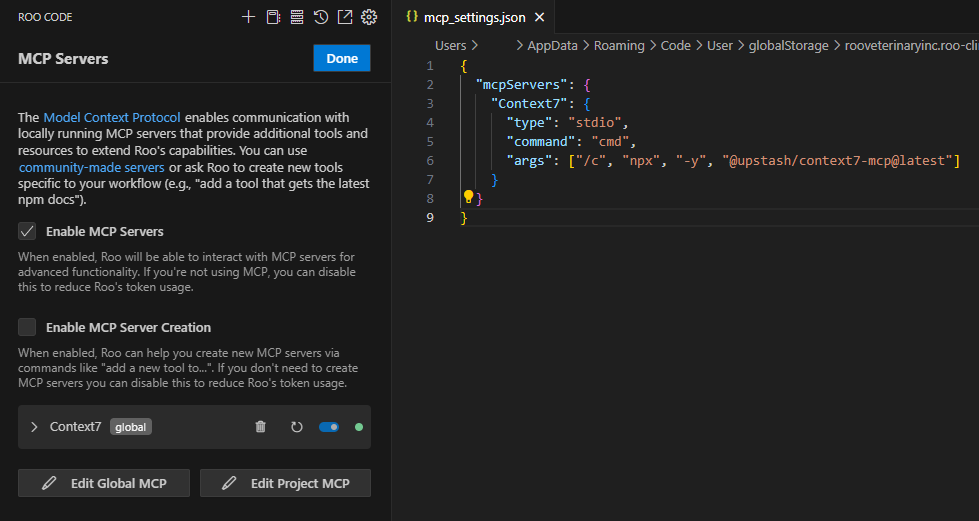
- Open the Roo Code MCP settings panel by clicking the icon.
- Click Edit Global MCP.
- Paste the JSON below inside the
mcpServersobject and save.
{
  "mcpServers": {
    "context7": {
      "command": "npx",
      "args": ["-y", "@upstash/context7-mcp@latest"]
    }
  }
}
Windows (cmd.exe) variant
{
  "mcpServers": {
    "context7": {
      "type": "stdio",
      "command": "cmd",
      "args": ["/c", "npx", "-y", "@upstash/context7-mcp@latest"]
    }
  }
}
Also on Windows (cmd) you may need to invoke npx through cmd.exe:
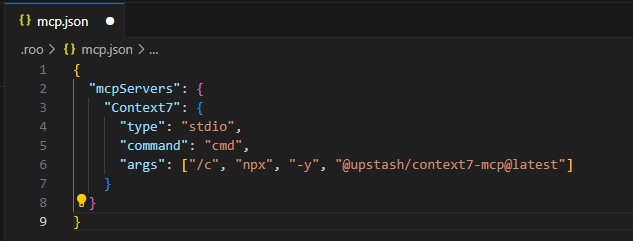
2. Project-level configuration
If you prefer to commit the configuration to your repository, create a file called .roo/mcp.json at the project root and add the same snippet:
{
  "mcpServers": {
    "context7": {
      "command": "npx",
      "args": ["-y", "@upstash/context7-mcp@latest"]
    }
  }
}
Windows (cmd.exe) variant
{
  "mcpServers": {
    "context7": {
      "type": "stdio",
      "command": "cmd",
      "args": ["/c", "npx", "-y", "@upstash/context7-mcp@latest"]
    }
  }
}
When both global and project files define a server with the same name, the project configuration wins.
Verifying the installation
- Make sure Enable MCP Servers is turned on in the MCP settings panel.
- You should now see Context7 listed. Click the toggle to start it if it isn't already running.
- Roo Code will prompt you the first time a Context7 tool is invoked. Approve the request to continue.
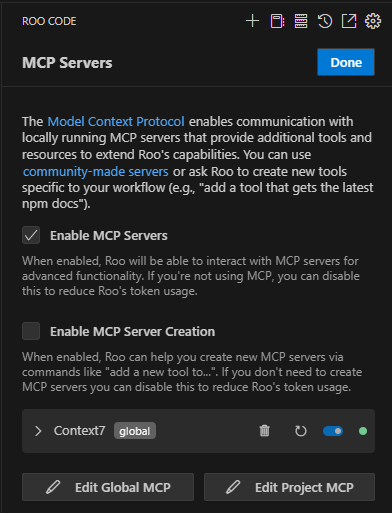
Next steps
- Browse the list of tools shipped with Context7 in the server pane.
- Configure Always allow for the tools you use most to streamline your workflow.
- Want to expose your own APIs? Check out the MCP server creation guide.
Looking for other servers? Watch this page – we'll add more recommendations soon!